
On This Page
Security
How Can I Enable Two-Factor Authentication (2FA) on Fastex?
To enhance the security of your Fastex account, follow these steps to enable Two-Factor Authentication (2FA):
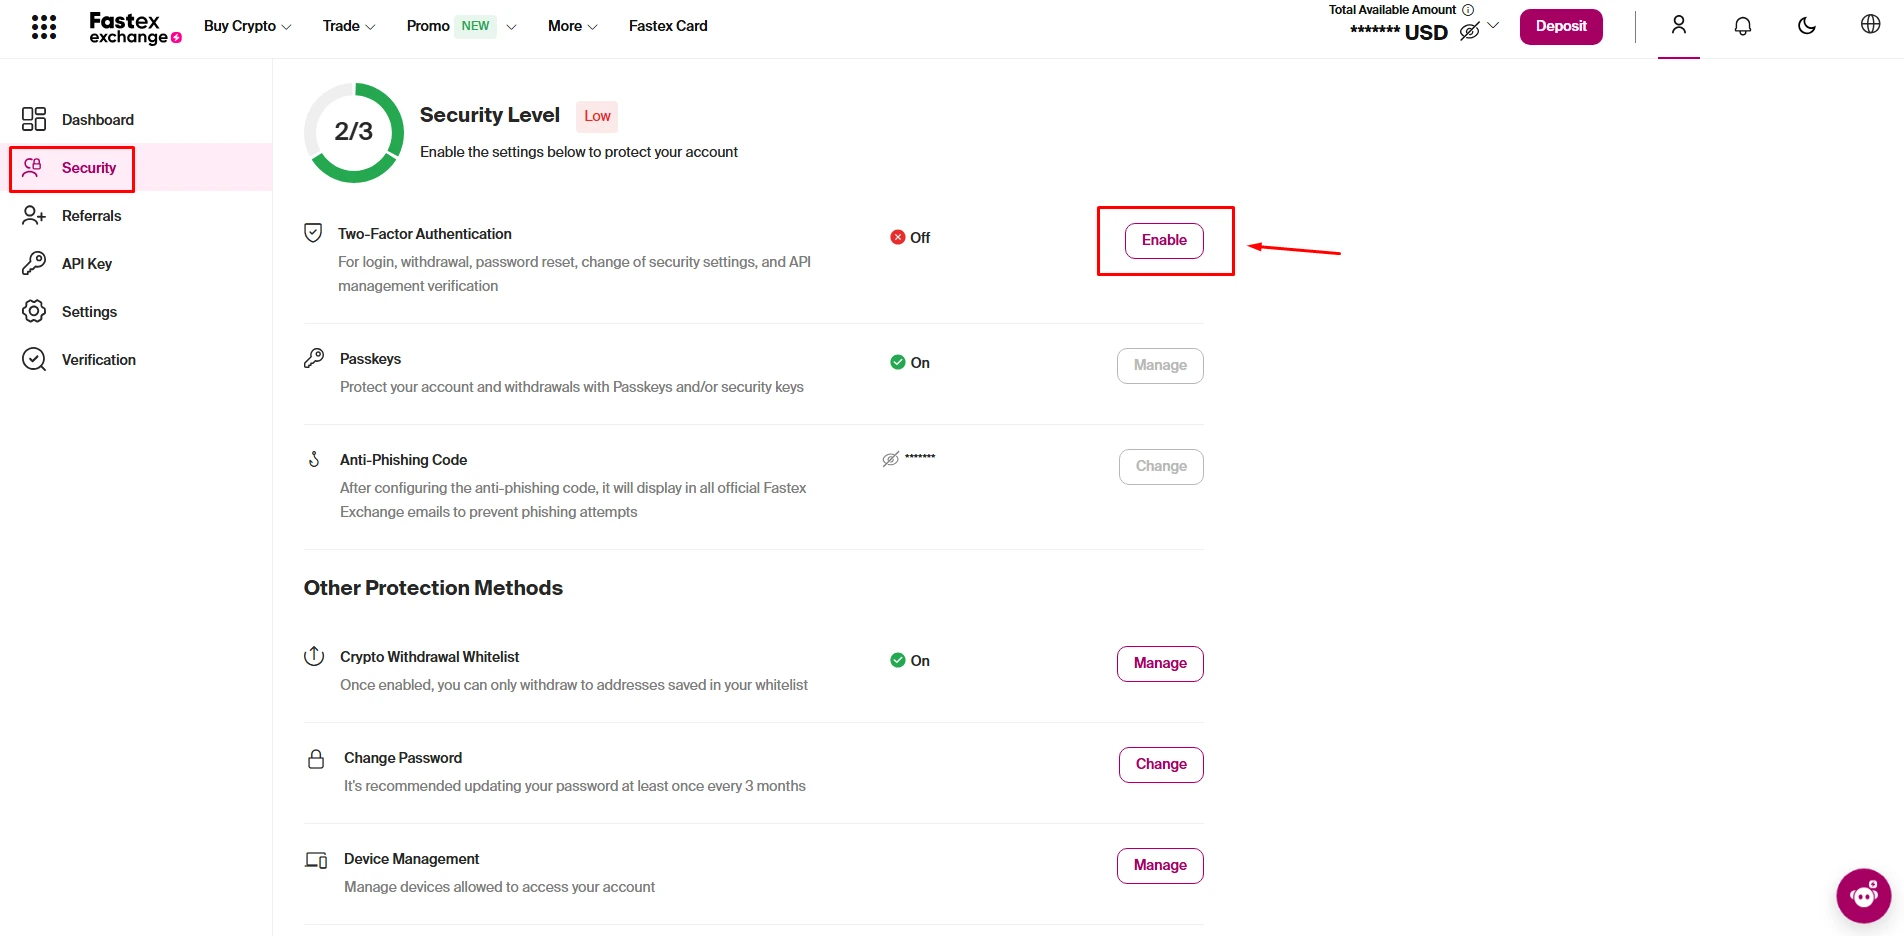
1. Login to your Security Settings: Click here.
2. Find the Two-Factor Authentication section and press the "Enable" button.
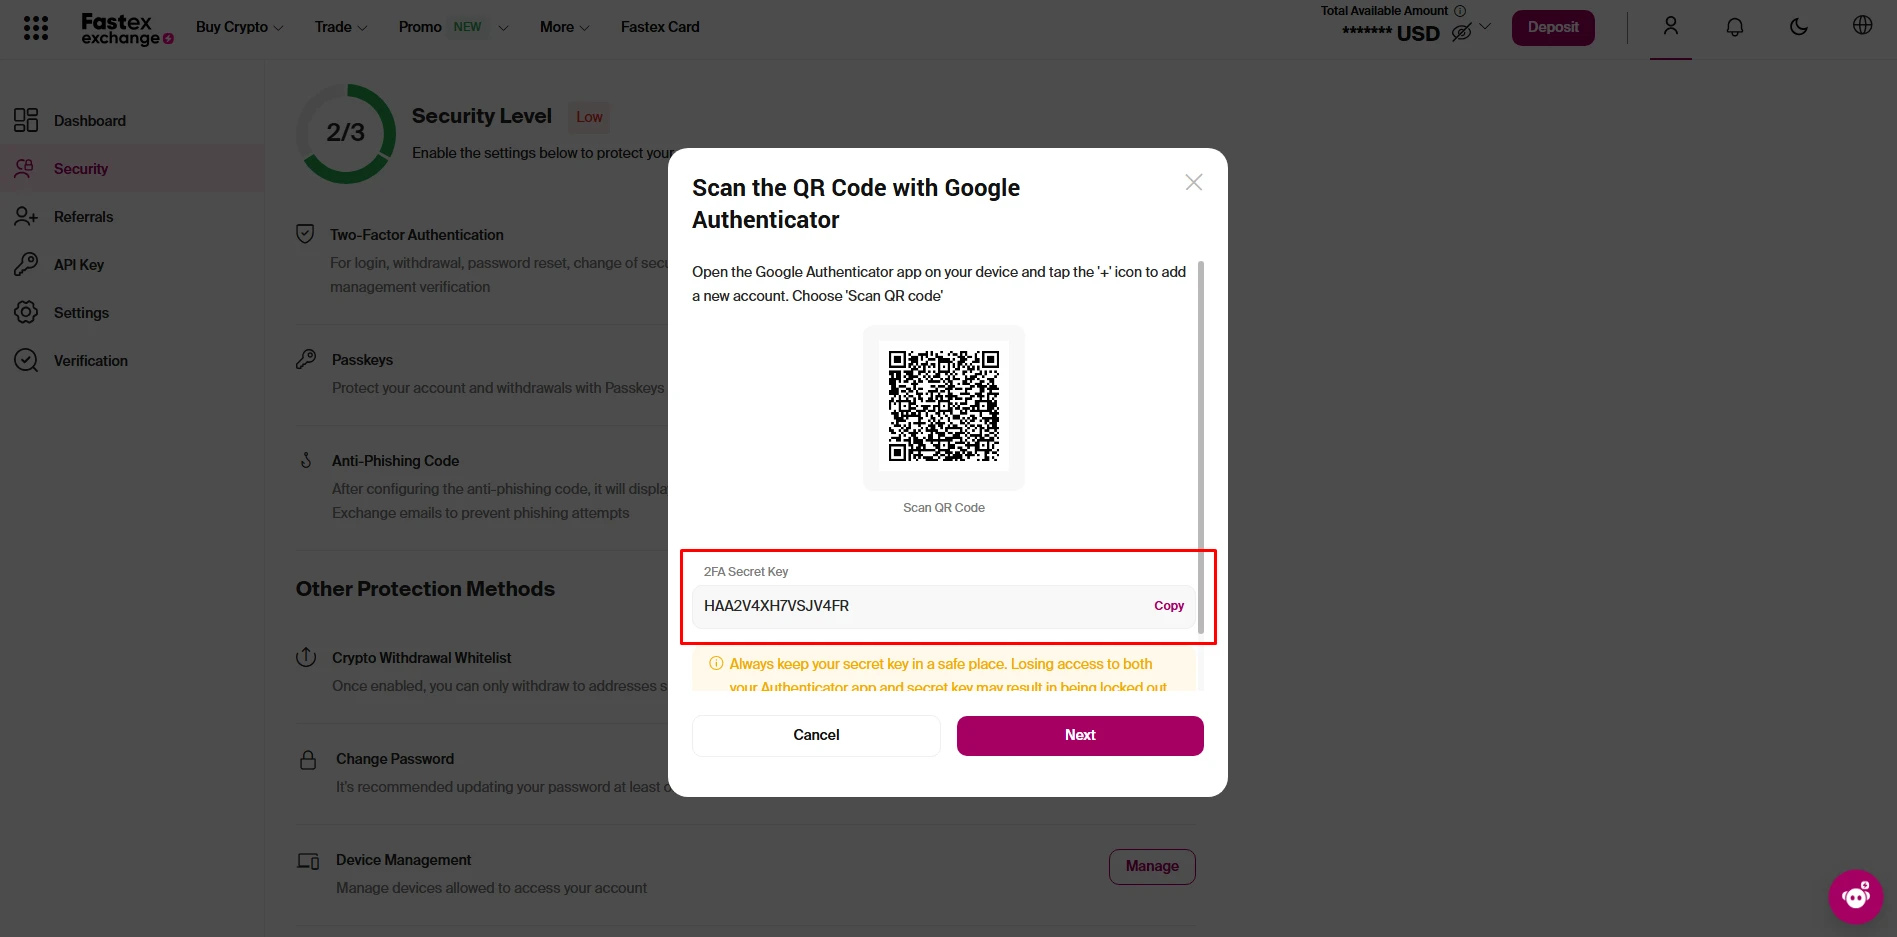
3. Download and install the Google Authenticator App on your mobile device. Click on the colored "Google Authenticator App" link in the setup window to be directed to the download page.
4. Set up Google Authenticator on your device:
- If using Fastex on a mobile device:
- Open Google Authenticator, press the "+" button, and select "Enter Setup Key".
- In the first line, enter a title of your choice.
- In the second line, enter the code provided on the 2FA verification page on the Fastex website.
- Press "Add" to complete the setup.
- If using Fastex on a computer browser:
- Open Google Authenticator, press the "+" button, and select "Scan a QR Code".
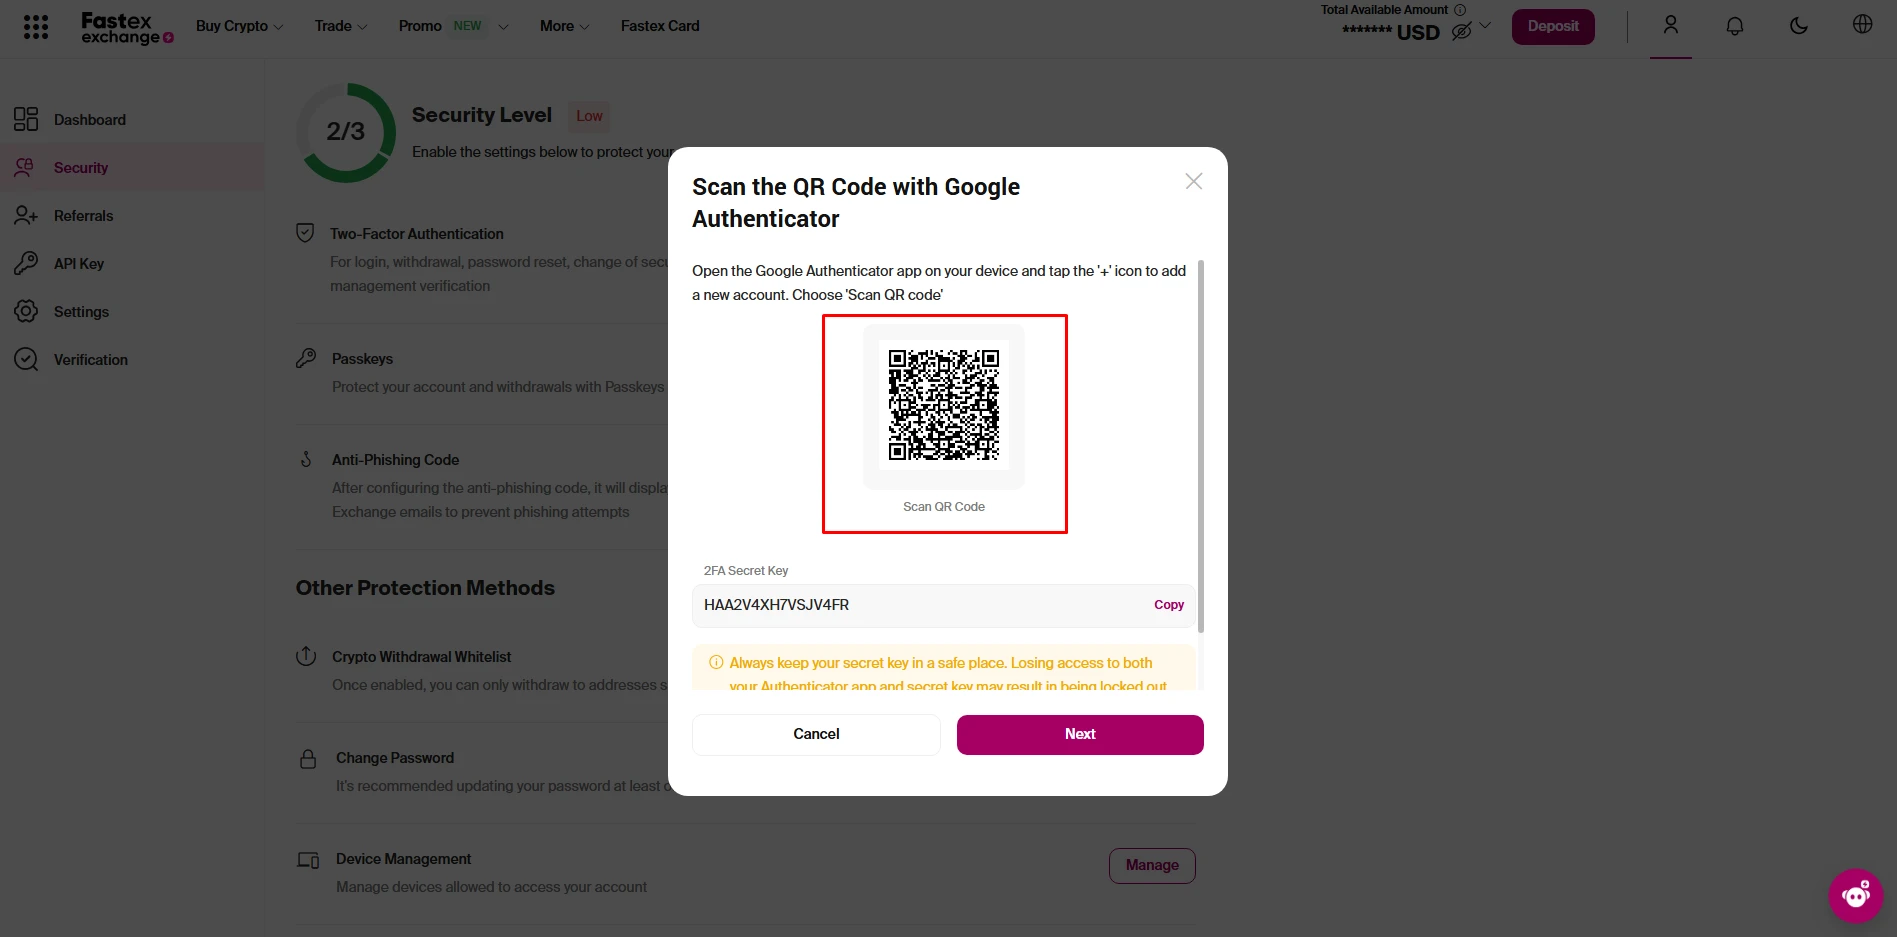
- Your camera will be activated. Scan the QR code displayed on the 2FA verification page on Fastex.
How Can I Disable 2FA on Fastex?
If you still have access to your 2FA code:
1. Log in to your Fastex account.
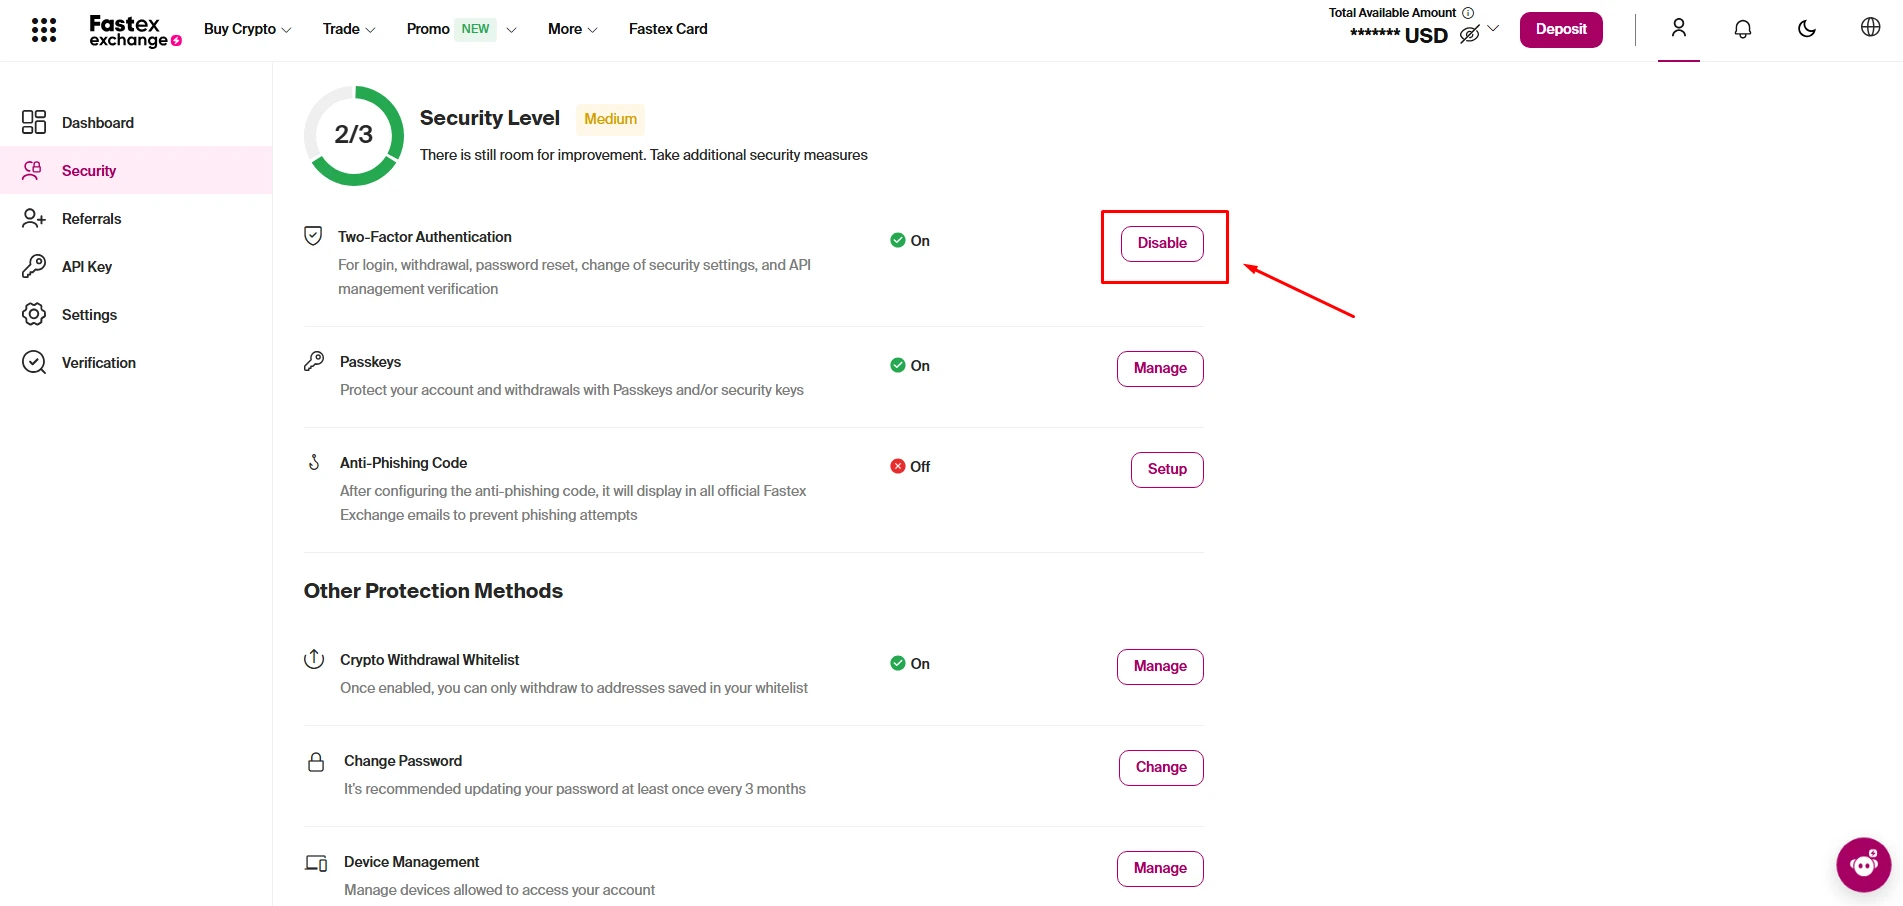
2. Go to Security Settings:
- Click on the Security section from the left-side menu.
3. Find the "Two-Factor Authentication" option:
It will display as On, indicating that 2FA is enabled.
4. Click the "Disable" button (as shown in the screenshot).
5. Enter your current 2FA code from the Google Authenticator app.
6. Confirm the action to disable 2FA.
If you lost access to your 2FA code:
1. Contact Fastex support by sending an email to [email protected] from your Fastex-linked email address.
2. Include the following details in your email:
- Your request to disable 2FA security setting;
- - The reason why you need to disable 2FA.
3. The support team will guide you through the next steps.
Once 2FA is disabled, log in to your account and re-enable it to ensure the continued security of your account.
What If I Change My Device or Lose Access to My Google Authenticator App?
- If your Google Authenticator is linked to your Google account, you can log in on a new device and retrieve your codes.
- Otherwise, you will need to disable and re-set up 2FA following the steps mentioned above.
What is an Anti-Phishing Code and How to Set It?
An Anti-Phishing Code is a security feature that helps you verify if emails from Fastex Exchange are legitimate or phishing attempts. Once set up, this code will appear in all official system Fastex emails, ensuring that any email without this code is likely a scam.
How to Set Up an Anti-Phishing Code on Fastex
- 1. Log in to your Fastex account.
2. Go to Security Settings
- Click on the Security tab from the left-side menu.
3. Find the "Anti-Phishing Code" section.
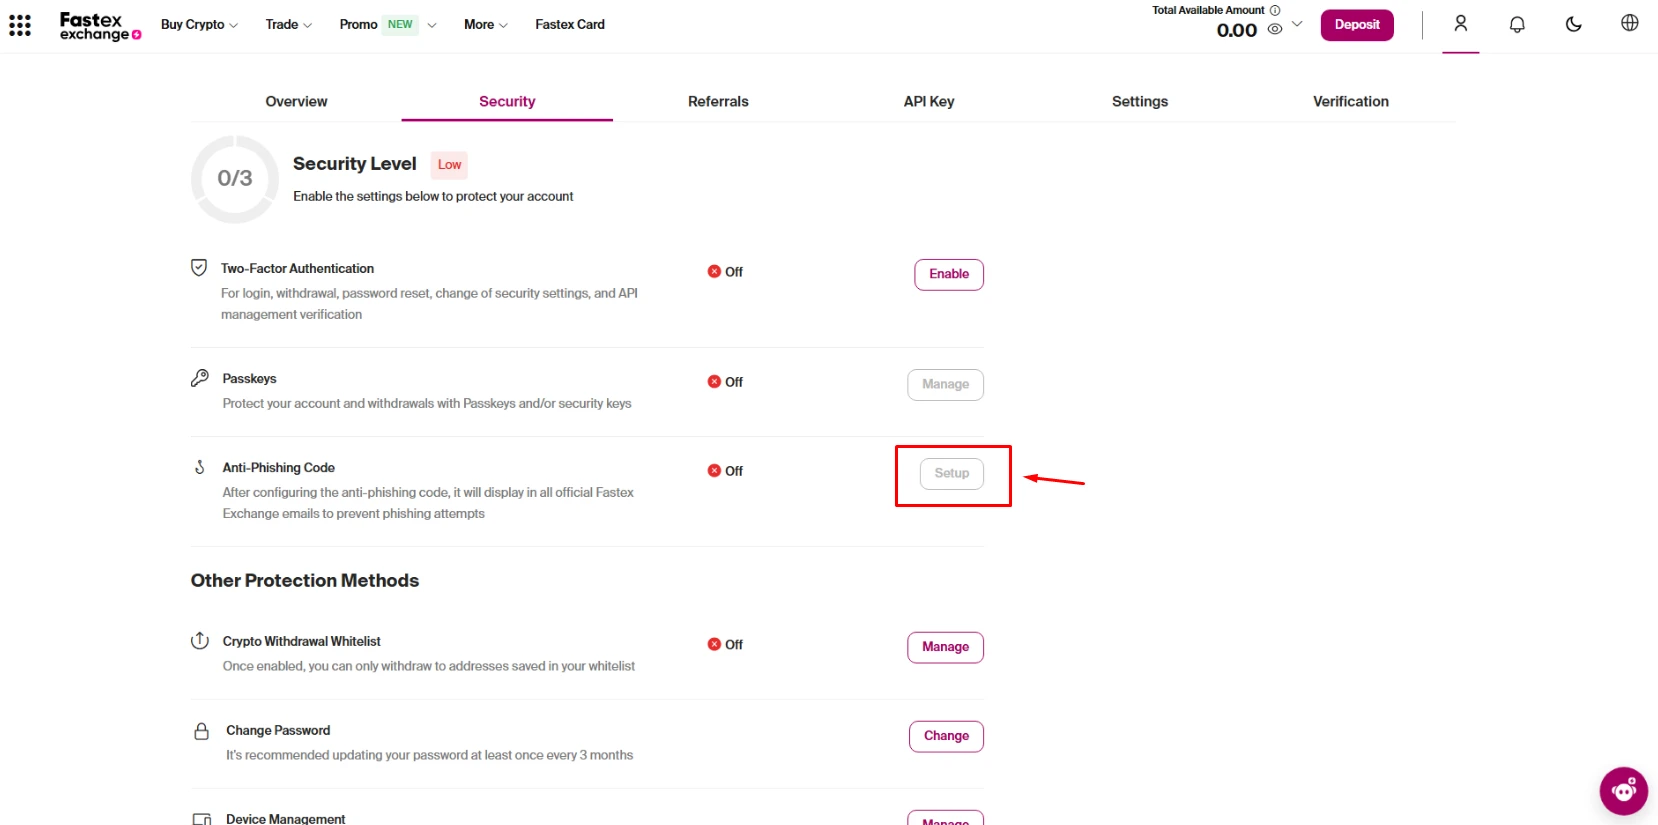
4. Click on "Setup"
- 5. Enter a unique code of your choice:
- Choose something memorable but not easy to guess.
6. Confirm and save the code.
Once activated, every system email from Fastex Exchange will include this Anti-Phishing Code, helping you identify real emails and avoid scams.
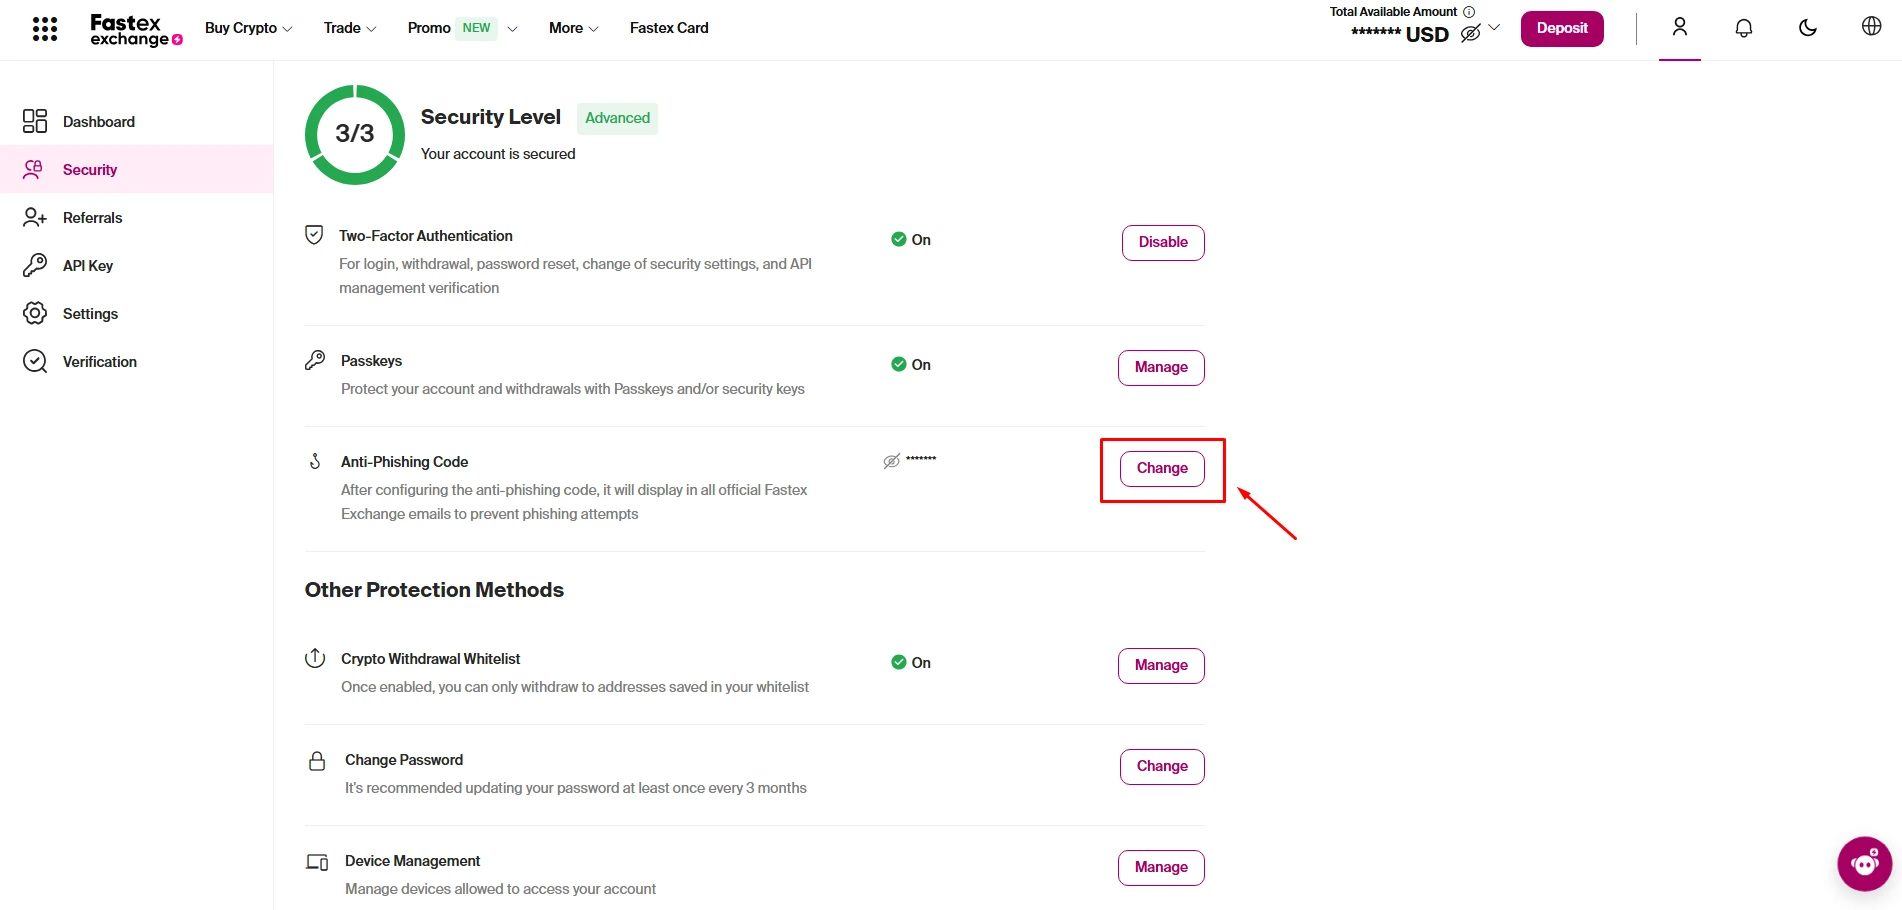
How to Change Your Anti-Phishing Code
1. Log in to your Fastex Exchange account.
2. Go to "Security Settings" from the left-side menu.
3. Find the "Anti-Phishing Code" section.
4. Click the "Change" button.
5. Enter a new Anti-Phishing Code of your choice.
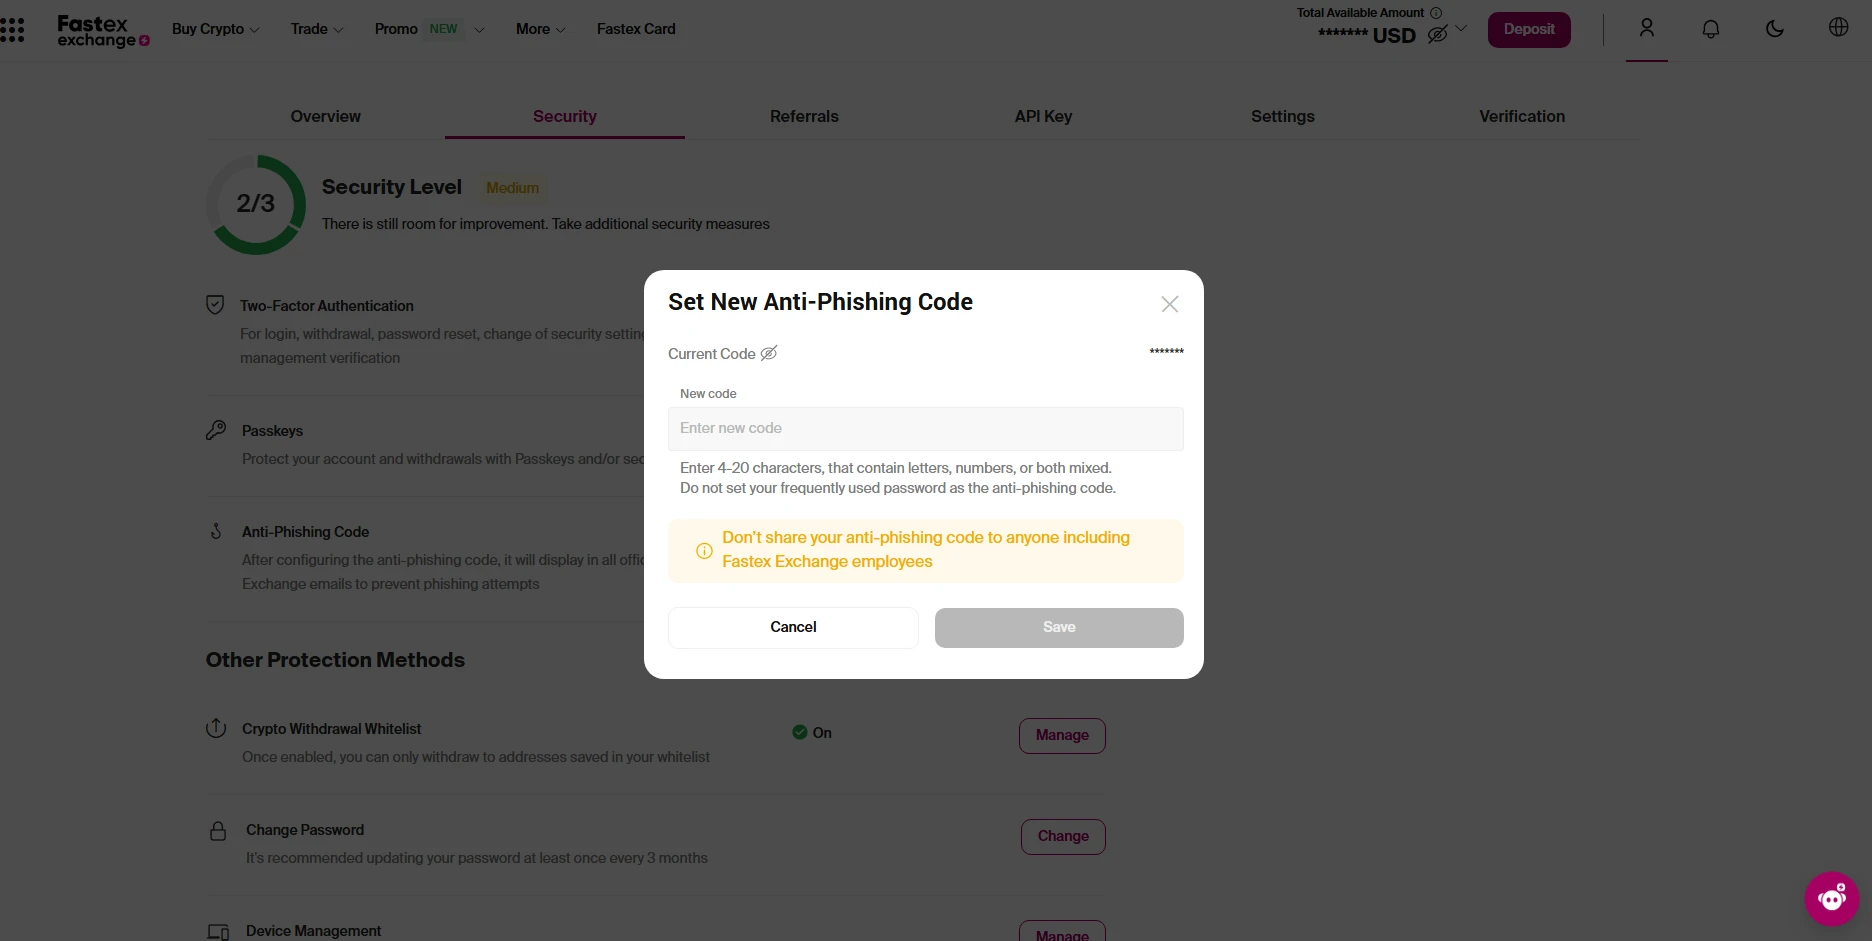
- 6. Confirm the change using 2FA authentication.
7. Save the new code.
After changing, all official automated emails from Fastex Exchange will display the updated Anti-Phishing Code, helping you verify their authenticity and avoid phishing scams.
Wallet Address Whitelist: How to Add and Delete Addresses
Whitelisting a wallet address on Fastex Exchange ensures that you can only withdraw funds to pre-approved addresses, adding an extra layer of security.
How to Add a Wallet Address to the Whitelist
1. Log in to your Fastex Exchange account.
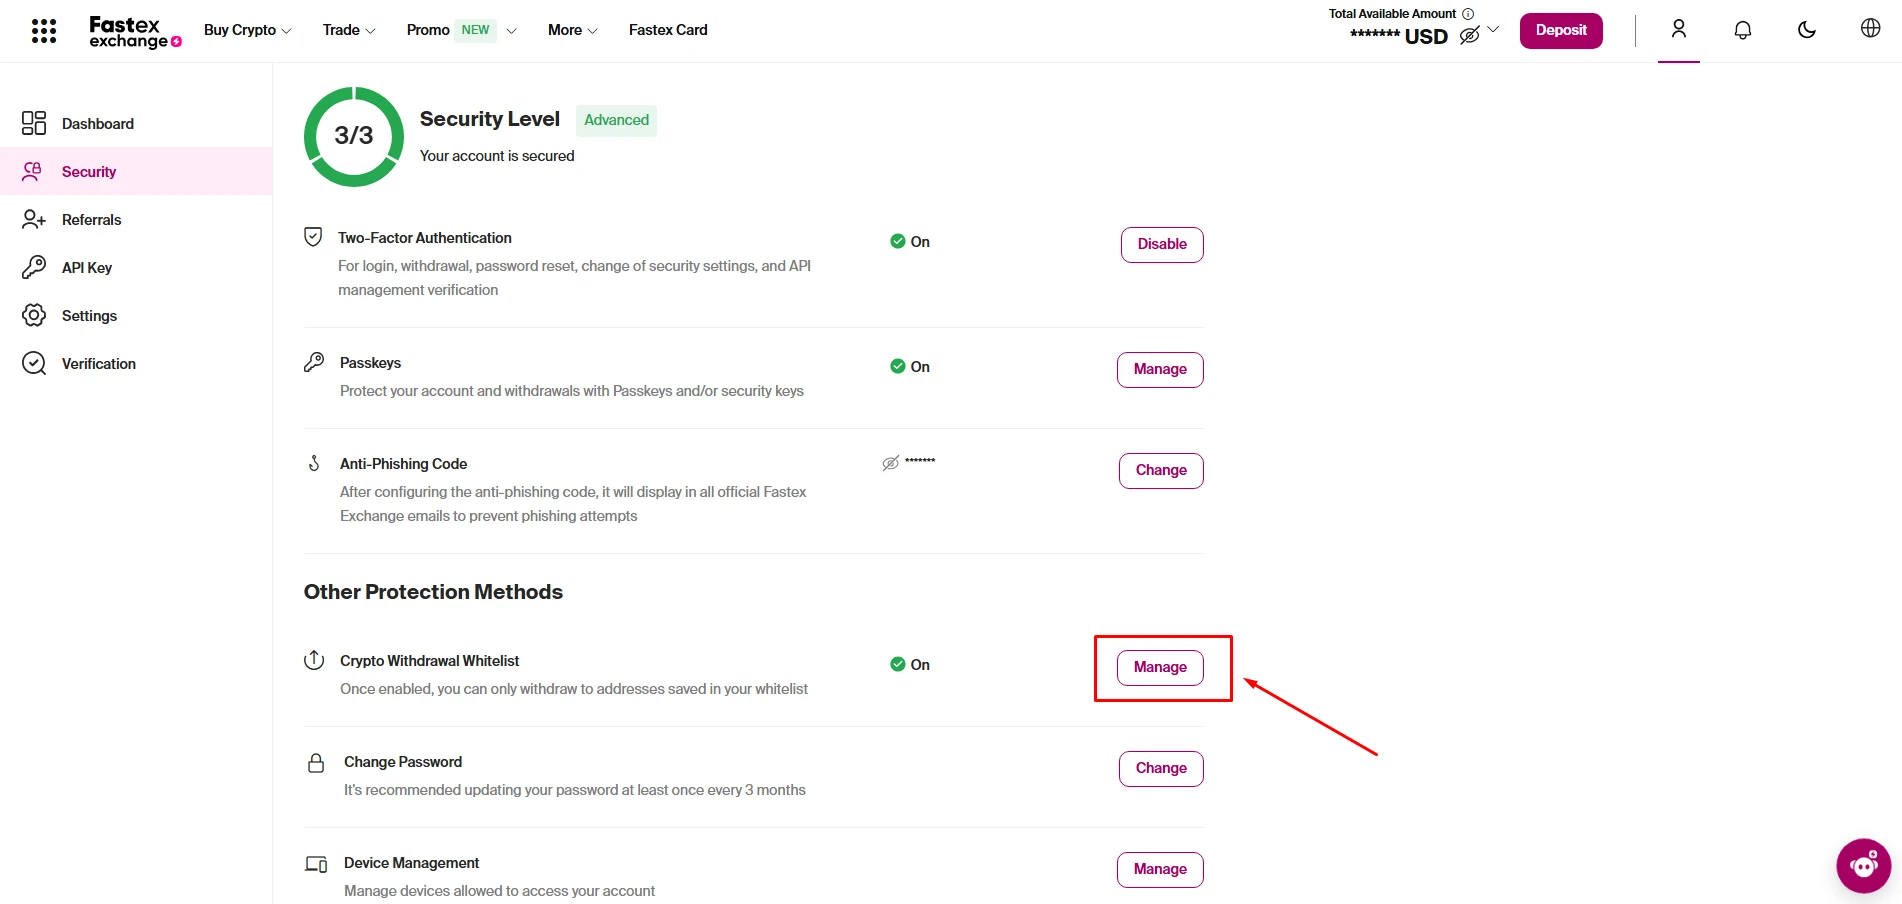
2. Go to "Security Settings" from the left-side menu.
3. Locate "Crypto Withdrawal Whitelist".
4. Click on "Manage".
5. Select "Add New Address" and enter the wallet address.
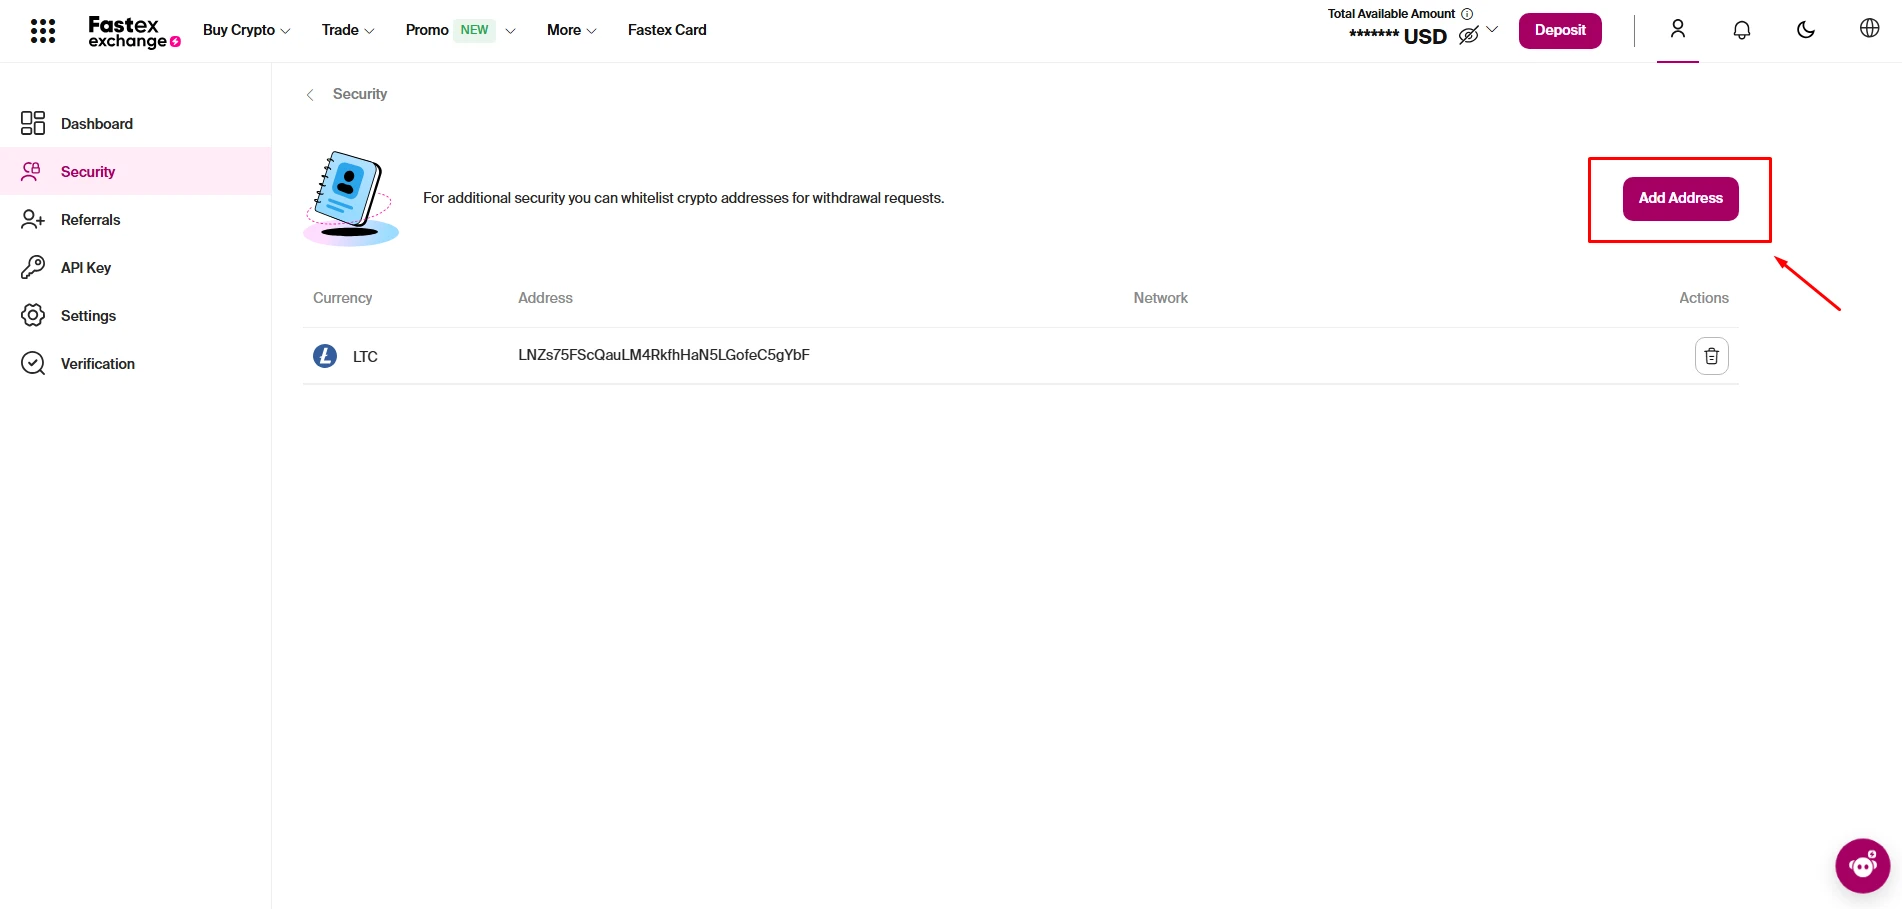
6. Confirm the addition using your 2FA code (Google Authenticator).
- 7. Save the changes—the address is now whitelisted, and withdrawals will only be allowed to this address.
How to Delete a Wallet Address from the Whitelist
⚠️ Important: Deleting an existing address from the whitelist will block your withdrawals for 5 days for security reasons.
1. Go to "Security Settings" in your Fastex Exchange account.
2. Find the "Crypto Withdrawal Whitelist" section and click "Manage".
3. Select the address you want to remove.
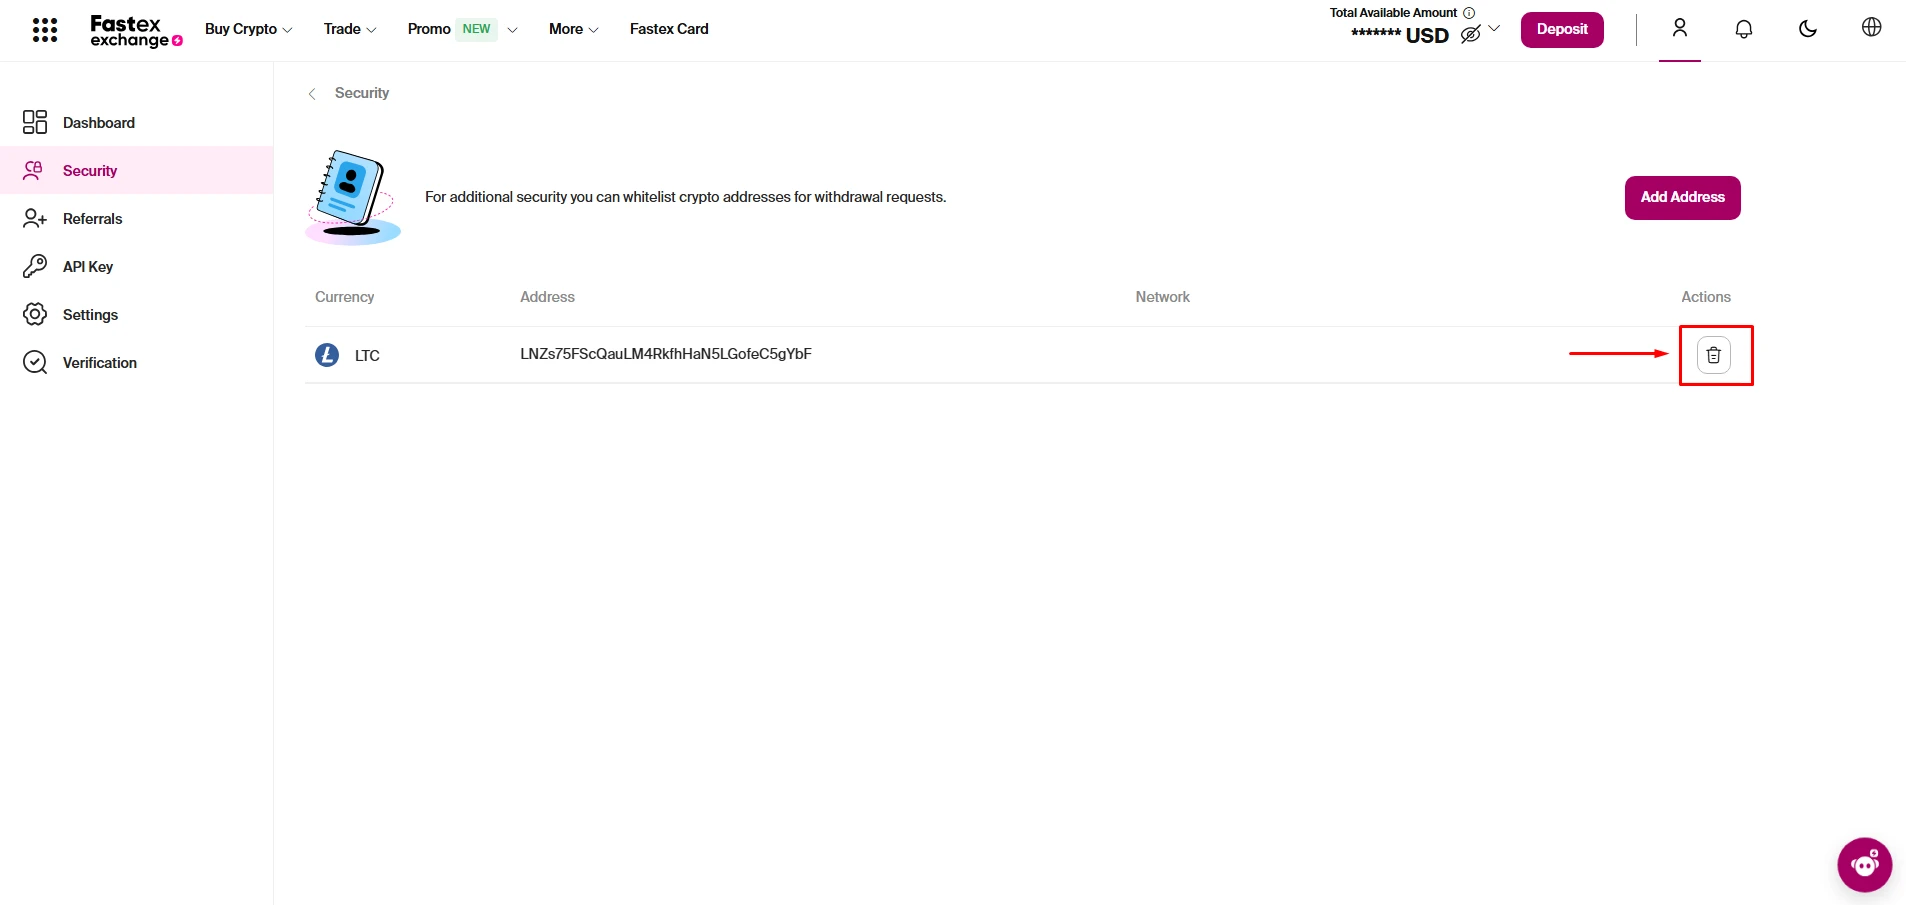
4. Click "Delete" and confirm the action.
- 5. Enter your 2FA code to verify the deletion.
6. Confirm the deletion—withdrawals will now be blocked for 5 days.
This 5-day security hold prevents removing a whitelist and withdrawing funds to unknown addresses in case of unauthorized access.
What is a Passkey and How Does It Protect Your Account?
Passkey is an alternative security feature that allows you to verify your identity on Fastex across various devices, rather than using a password and email or 2FA codes. It can be used to login, confirm a withdrawal request and similar actions that require authentication to process.
How to Set Up a Passkey
- 1. Go to Security Settings in your Fastex account.
2. Find the "Passkeys" section.
3. Click on "Manage".
4. Follow the instructions to register a Passkey on your device.
With a Passkey enabled, you can use this authentication method as a faster and more secure way to access your account and make withdrawals.